|
previous tutorial |
ACG Home |
Instructor Home |
Class Home |
list of tutorials |
next tutorial |
- Today's Goal
- Enhance initial drawings
- In this second step of the project, you return to each of the outlines traced in step one, and add drawing features to suggest solid three-dimensional objects. The end result will be five files, each showing a different crest with your enhancements.
- Make your own creative statement
- The handout describes several different graphic techniques--you decide how to match crests and techniques.
- Additionally, you can devise additional techniques, or combine multiple techniques on the same file.
- Some 3-D approaches you can try:
- Drop shadow: (creates the illusion that the crest is floating above the surface of the page)
- Select the outermost path of the crest outline. Edit-->Clone.
- Modify-->Arrange-->Send to Back; make sure the cloned image is still selected.
- In the Transform palette (if necessary, display it using the Window menu) click on the Move icon.

- Enter the distances to offset the cloned image horizontally and vertically (X & Y).
- Click <Apply>. Leave the path selected.
- Use the Fill and Stroke Inspectors (if necessary, display using the Window menu) to set the stroke to None and the fill to Basic. For the fill, choose an appropriate color or tint from the Color Mixer or Tints panels, respectively (if necessary, display using the Window menu).

- Under many lighting conditions, the edges of shadows are not perfectly sharp.

- For drop shadows only, soft edges can be created automatically using the Shadow tool (Window-->Toolbar-->Xtra Tools).
- Cast shadow: (creates the illusion that the crest is standing upright on a receding surface)
- Select the outermost path of the crest outline. Edit-->Clone.
- Modify-->Arrange-->Send to Back; make sure the cloned image is still selected.
- Double-click the Scale tool in the toolbox to activate the Scale button in the Transform palette.

- Click on the lower-left corner of the clone to enter its coordinates for Center X & Y.
- Uncheck Uniform. Enter Scale Factors: 100% for X., 60% for Y. Click <Apply>. Leave the path selected.
- Click on the Skew icon in the Transform palette.

- Click again on the lower-left corner of the clone to enter its coordinates for Center X & Y.
- Enter the skew angles: -45° for horiz., 0° for vertical. Click <Apply>. Leave the path selected.
- Use the Fill and Stroke Inspectors to set stroke to None and the fill to Basic (choose an appropriate color or tint)

- The perception of depth can be enhanced by combining the cast shadow with aerial perspective (accomplished with a gradient fill).

- Depth: (creates the illusion that the crest is a 3-D object with sides)
- This will be easier with simpler objects, such as the three-arm crest.
- Before starting, bring up the Preferences dialog (File-->Preferences). Make sure that 'Join non-touching paths' in the Object category and 'Clicking on layer name moves selected objects' in the Panels category are both checked
- Select the outermost path of the crest outline. Edit-->Clone. Leave the path selected.
- Use "New" in the Options menu of the Layers palette to create a new layer.
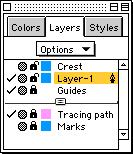
- Click on the name of the new layer (it will be 'Layer-1' by default) to transfer the clone to that layer. Press the Tab key to deselect.
- Drag the name of the new layer below the name of the Crest layer, so that the clone will be behind the original crest in the drawing.
- Click to remove check mark next to Crest layer, hiding it.
- Click on the name of the new layer to make it the active layer.
- Use the Arrow tool to shift-select the two points at the beginning and end of the visible portion of the outline (this is the part of the sides of the object seen by a slightly off-center viewer).
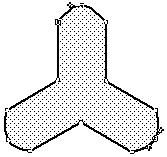
- In this example, we are assuming that the viewer is above and to the right of the object.
- In the example picture, the selected points are shown outlined and with direction handles extended.
- Use Modify-->Split to break the path at the selected points.
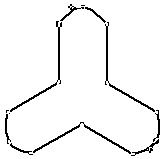
- Deselect all, then select the part of the path not visible to the viewer and delete it.
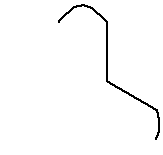
- Select the remaining portion of the path. Edit-->Clone. Use the arrow tool to move this second clone both horizontally and vertically. Leave selected.
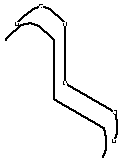
- Shift-click the first clone with arrow tool, so that both paths are selected.
- Modify-->Join. This will connect one endpoint on the first path to the closest endpoint on the second path.
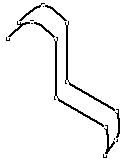
- In the Object Inspector, check Closed to close the combined path.
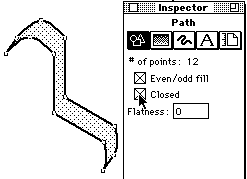
- Use Fill and Stroke Inspectors to set the appearance of the combined path as appropriate.
- In the Layers palette, click to display a check mark to the left of the Crest layer's name, showing the original crest outline.
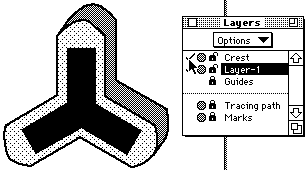
- The 3-D nature of the object is better conveyed if each surface can be shaded separately. You can use the Split and Join commands to break down the sides of the crest into separate closed paths. Each path can then be filled with a Basic fill (flat surfaces) or a Gradient fill (curved surfaces).
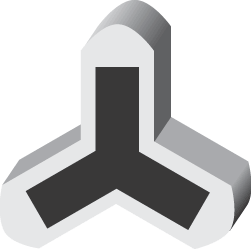
- Shading and highlights: (create the illusion that the crest is 3-D through lighting effects)
- Gradients can be used effectively to shade simple curved surfaces.
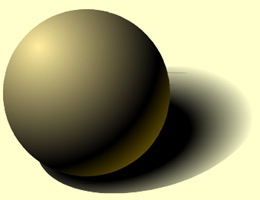 Radial gradients (the right button in the Fill inspector, after selecting Gradient from the pop-up menu at the top) are a good match for spherical objects.
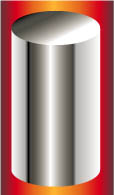 Parallel gradients (the left button in the Fill inspector) create realistic highlights on cylindrical objects. In fact, in the 'Depth' example, we were able to use parallel gradients because the curved surfaces are roughly cylindrical.
- More complex shapes will require the use of a more flexible shading technique called blending. Start by creating two new paths to control the shading on the crest.
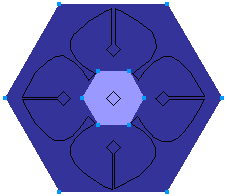
- These paths need not be the same shape as the crest. Rather, they should indicate how highlights and shadows change over the crest's surface.
- Make the first path large enough to completely enclose the crest. The second path should also be completely enclosed by the larger path.
- Use the Object Inspector to verify that each path is closed.
- Use the Stroke Inspector to set the stroke of each path to 'None'.
- Use the Fill Inspector to set the fill of each path to 'Basic'. Choose a light shade for the small path, and a darker shade for the light one.
- Select both the light and dark shapes. Modify-->Combine-->Blend.
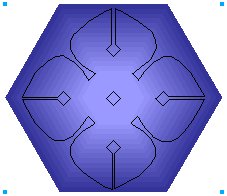
- Overlap the blend on the crest. Edit-->Cut.
- Select the outermost path of the crest outline. Edit-->Paste Inside.
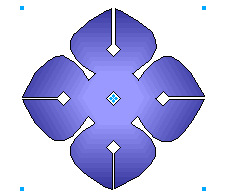
- Another way to shade an object using blends is to make separate objects for highlights and shadows, blending each from the local color of the crest to a tint (lighter value) or shade (darker value) of the same color.

|
previous tutorial |
return to top |
next tutorial |
Radial gradients (the right button in the Fill inspector, after selecting Gradient from the pop-up menu at the top) are a good match for spherical objects.
Parallel gradients (the left button in the Fill inspector) create realistic highlights on cylindrical objects. In fact, in the 'Depth' example, we were able to use parallel gradients because the curved surfaces are roughly cylindrical.