Computer Graphics Survey
Editing Digital Video
Using Premiere 5 on MacOS Computers
|
previous handout |
ACG Home |
Instructor Home |
Class Home |
list of tutorials |
next handout |
Before beginning the project
If you are working in the ACG Lab
click to read these important notes before you start the tutorial.
This section of the directions contains information that pertains specifically to the way the ACG Lab operates. It may not apply if you work on the project elsewhere.
- In our previous session, we used Premiere to create the elements for our video. We will now use Premiere's editing features to assemble a finished piece from those same elements. First we
verify the program settings, then we proceed to:
- The final step is to
edit the HTML file for your web page, adding a link to the completed video file.
return to top
- Unlike video recording, which requires special hardware, video editing can be accomplished (for small files) on any reasonably fast computer. You can therefore use any of the computers in the lab, as you did to create your title file. To set up the computer's configuration:
- Use Apple-->Control Panels-->Memory
- If you find that Virtual Memory is on, turn it off. After you close the Memory control panel, use the Special-->Restart command in the Finder to reboot the computer.
- If Virtual Memory is already off, simply close the Memory control panel. There is no need to reboot the computer.
- Use the Control Strip to switch display to thousands of colors.
- Make a folder on the hard drive, then copy into it the title file and the video recording created in the previous session.
- This is important because Premiere needs plenty of space for temporary files, and plenty of speed--both unavailable on a removable disk.
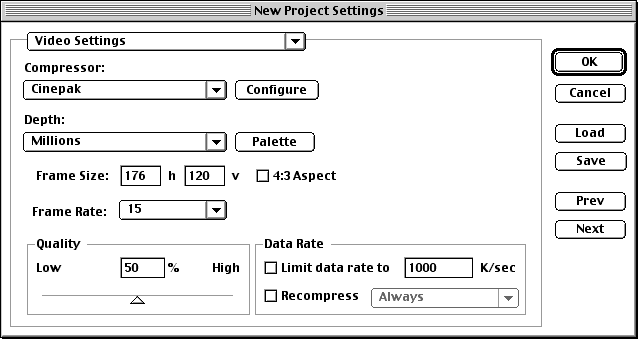
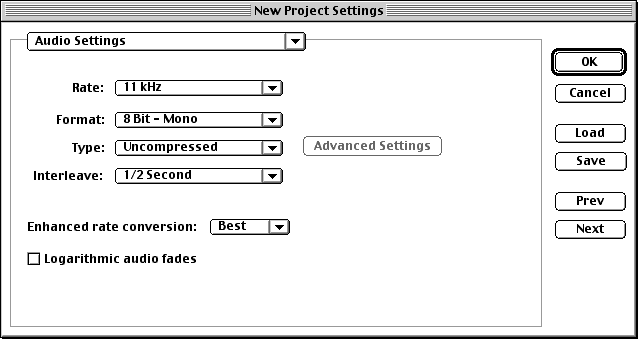
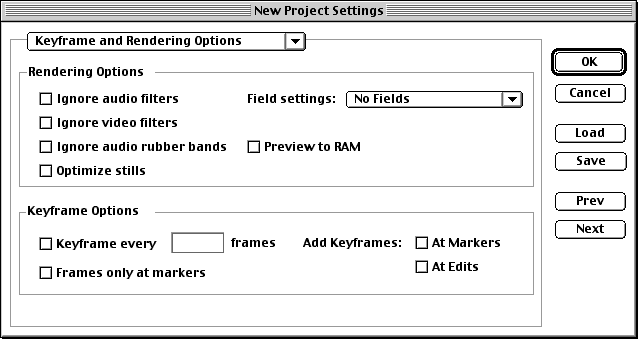
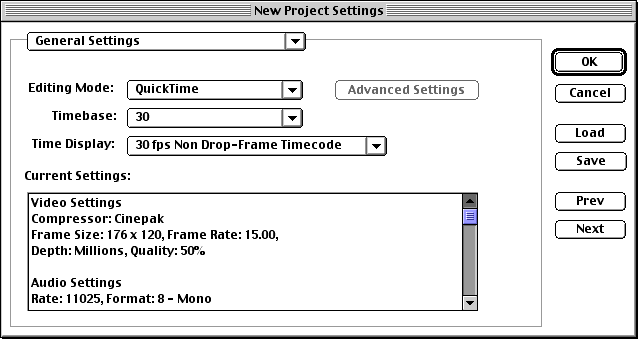
- Find and re-open the Premiere application. The New Project Settings dialog will appear (if it doesn't, use File-->New-->Project. This dialog has several parts, each one selected from a pop-up menu menu in its upper-left corner. The relevant settings are:
- Video Settings section:
- Audio Settings section:
- Keyframe and Rendering Settings section:
- General Settings section:
- When done establishing the various settings, close the New Project Settings dialog by clicking 'OK'. A new empty Project window will appear.
- Click on the Project window to make it active, then use File-->Save to store your editing project in the same folder with your title and recording files (you can choose any filename you like for the project file).

- The Project file contains information on the whereabouts of all elements, and their placement on the timeline.
return to top
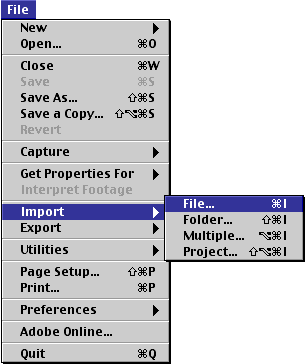
- Use File-->Import-->File.
- Use the Import dialog to locate your title file, then click 'Import'.
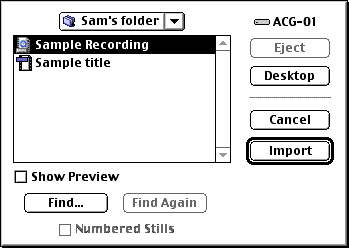
- Repeat the Import procedure for your video recording file.
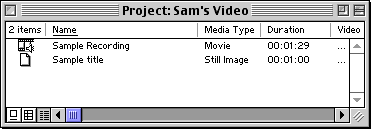
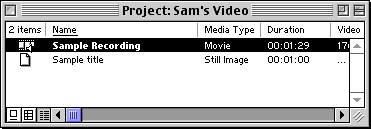
- Both will appear as clips in the Project window.
- Premiere needs to know when, and for how long, each element will appear in the final video. This is indicated by dragging each clip to an appropriate location in the Timeline window.
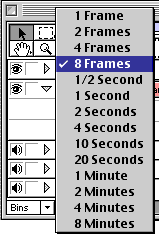
- If you have trouble determining time locations on the ruler, you can change its scale using the pop-up menu at the bottom-left of the Timeline window.
- In our setup, we asked Premiere to indicate times and durations using the format hours:minutes:seconds:frames. This is called SMPTE Timecode.
- Drag the title from the project window to the Video 1A channel (called A Roll), and position it so that its thumbnail is flush with the left edge of the window.
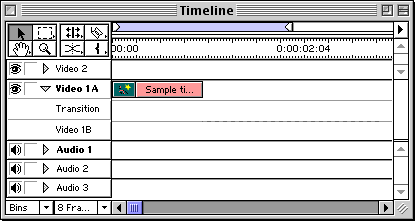
- Because of the delays in web playback, there is no need for a long 'hold' on the title card. The default duration for a still image (1 second) is enough.
- Before adding the video recording to the timeline, you may want to trim it (i.e., eliminate parts you don't need at the beginning and end):
- To trim a clip, start by double-clicking its entry in the Project window.
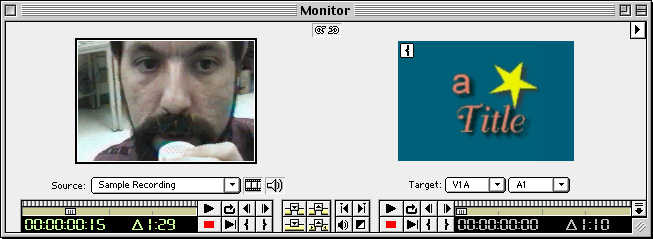
- The Monitor window appears. Drag the slider on the left of the window to advance the recording to where you want to start its playback.
- Click the Mark In button to indicate the in point (start of playback).
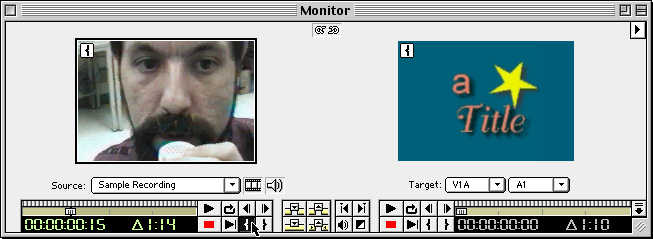
- Scroll again to find the time when the playback should stop. Click the Mark Out button to indicate the out point (end of playback).
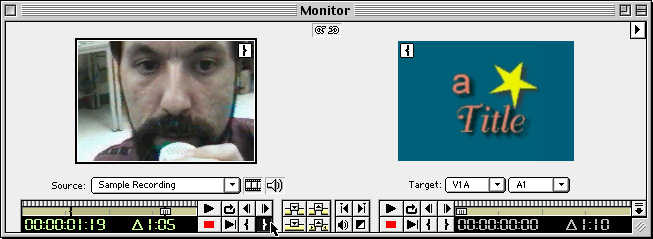
- Drag the trimmed clip from the Monitor window to the Video 1B channel (the B Roll), and position it so that it starts a short time before the title ends. This overlap between the two clips is meant to accommodate a transition.
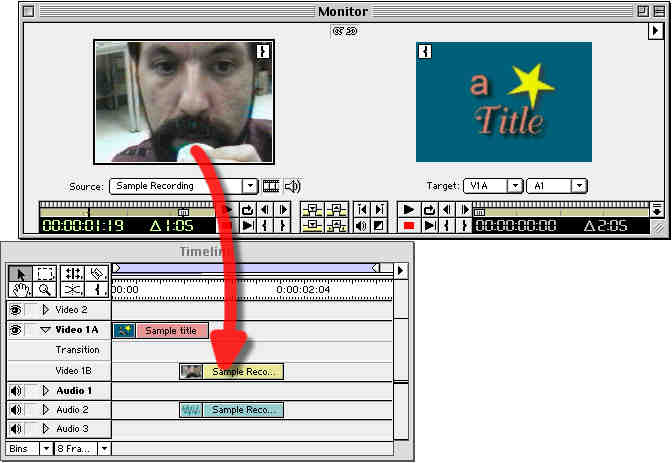
- You have now assembled a simple video. You can see what your work looks like so far by previewing it:
- Extend the light blue band at the top of the window (the Work Area) to encompass all your elements. Do this by dragging the white triangle at the right end of the light blue band.
- Use Project-->Preview to start playback.
return to top
- Transitions let you replace the abrupt change from title to video (a jump cut) with a visual effect (such as a wipe).
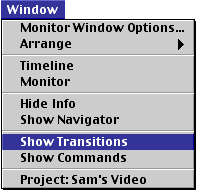
- If necessary, display the Transitions palette by using Window-->Show Transitions.
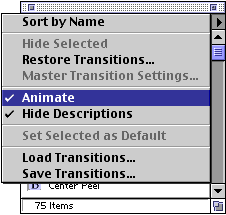
- The thumbnails for each effect can animate, previewing the result of using that transition to go from image A to image B. To turn on this feature, make sure the Animate command is checked in the Transitions palette menu.
- Scroll to find the transition you prefer. Drag the transition thumbnail to the Transition channel (the one between the A and B rolls) in the Timeline window, positioning it right where title and video recording overlap.
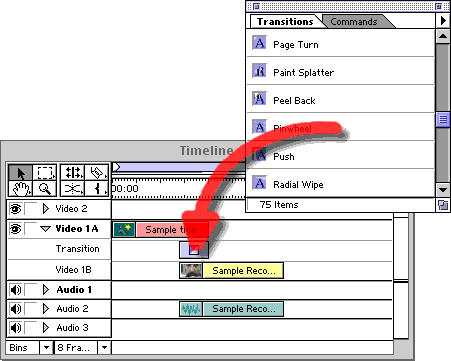
- Premiere will automatically size the duration of the transition to match the amount of overlap.
- Use Project-->Preview again (or press the Enter key on the numeric keypad) to see the revised version of your video.
return to top
- Save your edited project (you will need it again for any modifications): File-->Save.
- Use File-->Export-->Movie to generate the final version of your edited video.
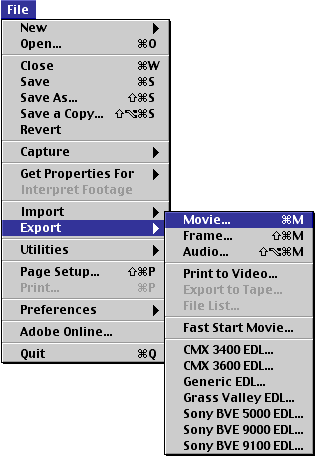
- In the dialog box that appears, enter the filename in the format:
sample_s.mov
using your last name and first name initial.
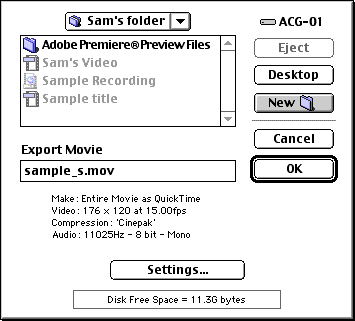
- The output settings we chose at the beginning of the project are recapped at the bottom of the dialog. If incorrect, you can click the 'Settings' button to fix them.
- Click 'OK' in the Export Movie dialog to start outputting the file that you will use in your web page.
return to top
- In the .html file for your homepage, add the following
link so viewers can call up your video:
<A HREF="sample_s.mov">Click here to see my video</A>
replacing sample_s.mov with the actual name of your .mov file, and Click here to see my video with whatever text you want viewers to click on.
- Before leaving, make sure to use File-->Save to update your project, then quit Premiere and dispose appropriately of your files:
- The Premiere project and your source files (the original video recording and the title card) are needed if you want to make changes to your edits at a later time.
- The .mov file and the revised .html file can be posted on the web.
- The folder of preview files that Premiere creates can be tossed out.
return to top
Notes
- We are creating a hyperlink that will bring up the movie separately from our main web page.
- While it is possible to embed the movie in the web page, keeping it separate gives viewers the choice to download the video, or pass on it because of its size.
return
Information specific to the ACG Lab
- On ACG Lab computers, the program Premiere is on the hard drive, inside the Video folder.
- In the ACG Lab, documentation on Premiere is on the ACG_DOCS volume of the ACG file server, inside the PageMaker folder:
- After completing this step of the project, follow the instructions from previous sessions to log on to the file server 'ACG' and to locate the drop folder in the class folder. Drag both the updated version of your HTML file and your output video file (.mov) to the drop folder. Before leaving, make sure to copy your Premiere project and title files back to your Zip disks.
- The Art Computer Graphics program of Fullerton College offers a class covering digital video in detail, ACG66-Multimedia Video. Look it up in the ACG Class Schedule.
return
|
previous handout |
return to top |
next handout |
|
This document originally at <http://acg2.fullcoll.edu/FACULTY/CORSI/LEARN/OVERVIEW/OV140/MAC0EN_P.HTM>
|
|
Copyright 1997-2000 by Sandro Corsi.
Last modified 2000-04-22.
|
SaneDraw home
|