Computer Graphics Survey
User Interface Basics (and Text Entry)
Using PageMaker 6.0 on MacOS 7 Computers
|
ACG Home |
Instructor Home |
Class Home |
list of tutorials |
Before beginning the project
Read the
information that pertains specifically to the way the ACG Lab operates.
These directions may not apply if you work on the project elsewhere.
- Adobe PageMaker is one of the two most widely used page layout programs (the other one being QuarkXPress). It was first released by the Aldus corporation in the summer of 1985, marking the beginning of desktop publishing. Adobe purchased Aldus in 1995 and in recent upgrades added several tools for
electronic publishing, besides updating the traditional print media features.
- For our project, we will use PageMaker's extensive type editing capabilities to enter text. We will later use the electronic publishing additions to create the HTML skeleton of a web page incorporating the text we entered.
return to top
- A convenient storage location for your work
- While working on your project, you will want to make use of the fastest storage device hooked up to your computer, the hard drive. This is typically also the startup disk, and consequently appears at the top-left corner of the desktop.
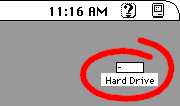
- This is still useful even if at the end of the project you will need to copy your files to a removable device (such as a floppy disk) to take your work with you. The slightly longer set-up and strike-down procedures are more than offset by the amount of time saved while working.
- You also want to be able to access quickly the storage location. The most convenient place is right on the desktop, because it is only one click away in both the Open and Save dialog boxes.
- To create a folder on the desktop for your work, click once on any desktop icon (the startup disk will do) to select it, then use the Finder's File-->New Folder command.
- Find and launch the program PageMaker.
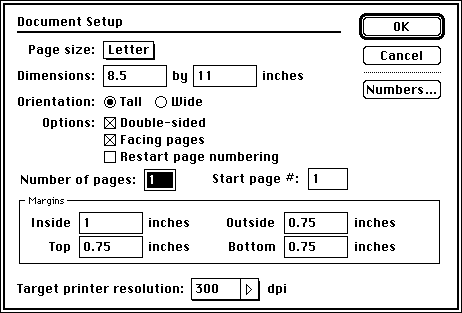
- Use the File-->New command to create a blank new document. You can leave the Document Setup settings at the default values by clicking OK.
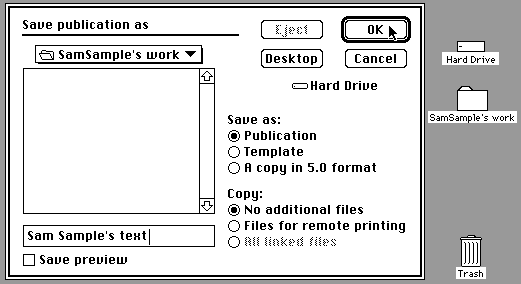
- Immediately copy your document to disk for safekeeping, using the menu command File-->Save. The recommended location for this and other documents is in the folder that you created on the desktop.
- Remember to use File-->Save early and often from now on to keep your work from disappearing should disaster strike.
return to top
- Click on the the Text tool (marked with a capital 'T" in the toolbox).

- Drag to draw a box within the document window. This creates a text column--a portion of the page where you can put type.
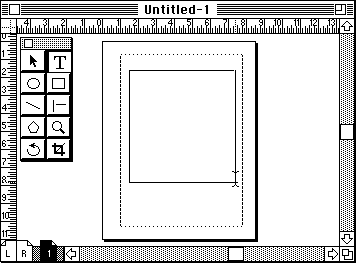
- The box disappears as soon as you release the mouse button. You will see a flashing bar where the upper-left corner of the box was--this is the text insertion point (the location where anything you type will be placed). Go ahead and start entering the text for your web page.
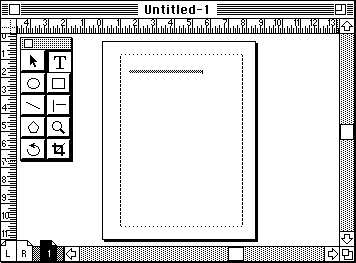
- Notice that the type is very small. It is so small that PageMaker replaces it with a grey bar (called greeking) instead of wasting time displaying type you could not read anyway. To read your type, change the display magnification using Layout-->View-->Actual Size.
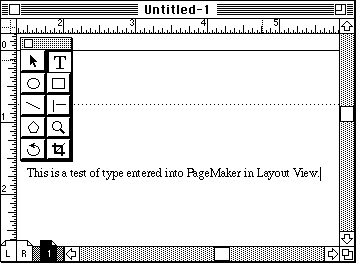
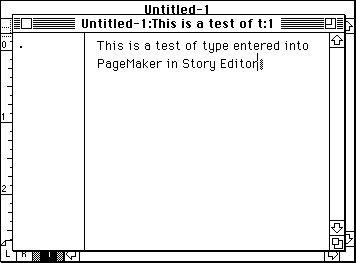
- You are currently looking at the Layout View of your PageMaker document. For more convenient text entry, switch to the Story Editor using Edit-->Edit Story. You can return to the Layout View at any time by closing the Story Editor window. The story Editor also makes available commands to check spelling and to search and replace text (both in the Utilities menu).
return to top
- Selecting Text
- In general, Macintosh software requires that you first select an item (such as a piece of text); then use a menu command or tool to alter the selected item.
- The simplest way to select text is to drag the Text tool over it:
- Make sure the Text ('T') tool is selected in the toolbox.
- Click and hold the mouse button at the beginning of the text to be selected.
- While holding down the mouse button, move the pointer to the end of the text to be selected. Note that you don't have to drag across each line of text--you can simply drag down or up to your destination.
- Release the mouse button, leaving the text highlighted. Highlighting is done either by reversing the type (white on black), or adding a colored background to it, depending on the settings in the Color control panel.
- A faster way to select specific text elements is through multiple clicks of the text tool:
- Virtually all programs support double-clicking on a word to select it (double-clicking is two clicks in rapid succession at the same location).
- Some programs will also support triple-, quadruple-, quintuple-clicking to select entire lines, paragraphs, or stories (a series of linked paragraphs).
- When selecting a very large amnount of text (several pages), dragging while selecting can be very slow. Instead, use the Shift key to extend the selection:
- Click the mouse button at the beginning of the text to be selected.
- While pressing the Shift key, click the mouse button at the end of the text to be selected. All the text between the locations of the first and the second click will be highlighted.
- Shift-clicking can also be used to extend or reduce an existing selection.
- Cut-and-paste
- Once text is selected, it can be re-arranged and formatted. The process of re-arranging text is commonly accomplished by cutting and pasting through the Clipboard.
- The first step in cut-and-paste involves placing the selected text on the Clipboard. This is accomplishedby two commands found in the Edit menu: Cut and Copy.
- The difference between Cut and Copy is that the former removes the selection from its original location, while the latter leaves a copy behind.
- Since the commands for cut-and-paste are used frequently, you might want to note their
keyboard equivalents:
- Command-X for Cut
- Command-C for Copy
- Command-V for Paste
- These keyboard commands, as well as Command-Z for Undo, are standard across all Macintosh applications.
return to top
- When done, use File-->Quit to exit PageMaker.
- If no other programs were running on the computer, you will be returned to the Finder. Otherwise, you may have to select the Finder from the Application menu (the icon at the far right of the menu bar).
return to top
Notes
- The keyboard equivalent of a command performs the same action as the menu command itself, but does not require that you take your hands off the keyboard to use the mouse.
- You can look up the keyboard equivalent for any command directly in the pull-down menus. The keyboard equivalent (if available) is listed alongside the command as one or more
modifier key symbols followed by a letter.
- To activate the command, press and hold down the modifier key(s), press and release the letter key, release the modifier key(s).
- Some programs may also support keyboard equivalents for commands and tools in palettes and button bars. There is no standard way to indicate these keyboard equivalents on the screen--you will have to look them up in the program's documentation.
return
- A modifier key has no effect when pressed by itself. Its purpose is to change the operation of other keys.
- Current Macintosh keyboards include the following modifier keys:
- Shift
- Caps Lock
- Like the Shift key, it will capitalize letters. Unlike the Shift key, it will not yield the special characters listed in the top half of number and punctuation keys.
- The Caps Lock key is not the same as the Shift key in keyboard equivalents (i.e., Shift-Command-4 is not the same as Caps Lock-Command-4). While it may be occasionally used to invoke commands, there is no standard symbol to indicate Caps Lock in menus.
- Command
- Option
- Control
return
Information specific to the ACG Lab
On ACG Lab computers, the program PageMaker is in the hard drive, inside the DTP folder.
Detailed instruction on all aspects of PageMaker's use is available through the Art Computer Graphics program of Fullerton College in course ACG140-Desktop Publishing I. Look it up in the schedule of classes.
return
|
previous |
return to top |
next |
|
This document originally at <http://acg2.fullcoll.edu/LEARN/OVERVIEW/OV020/MAC0EN_P.HTM>
|
Copyright 1997 by Sandro Corsi.
Last modified September 5, 1997.
|
SaneDraw home
|