Soundtrack completion using SoundEdit and Director
|
ACG Home |
Instructor Home |
Class Home |
list of tutorials |
To complete the soundtrack for our animation we will
- Modify the sounds you recorded in the previous session
- Combine the sounds with the animation visuals
- Export the animation to web-compatible Shockwave format
- Modify the HTML file to display the animation in the web page
For the first step we will return to SoundEdit; the following two steps will be done in Director; for the last step we will use a text editing program.
Sound Editing
- Re-open your sound file using SoundEdit.
- Adjust the waveform display to better see the parts you are interested in
- Zoom in for a detailed view
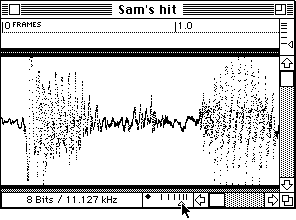
- Zoom back out to see the big picture
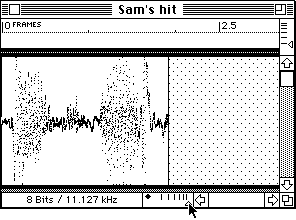
- Click in the waveform display, and drag to highlight the portion of the sound that you want to modify.
- Verify that the selection matches the sound you want by using Play (in Control menu): only the selected portion of the sound will be heard.
- To easily identify and retrieve the selected portion of the sound, create a Label (in the Insert menu). When the highighted default label appears, enter a brief name for the selection.
- If you later click on the Label, the sound segement will be selected again, so you can go back to working with it.
- Labeled segments can be quickly selected and/or played using the Labels palette (Window menu).
- While the segment is selected, it can be color-coded using the Color submenu of the Modify menu.
- Once you are satisfied with your selection, apply to it one or more of the commands from the Effects menu. As always, make sure that you have a backup of your sound in case you cannot undo an experiment you end up not liking. Below are some examples based on this original waveform:
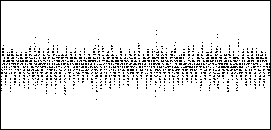
- Amplify
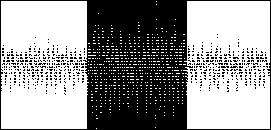
- Fade in
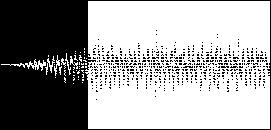
- Fade out
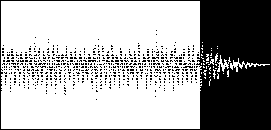
- You can also use commands in the Edit menu, such as Crop
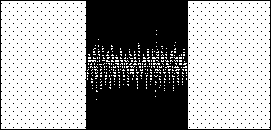
- And commands in the Insert menu, such as Silence
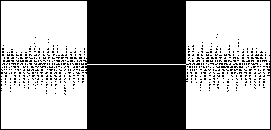
Note that the commands in insert can also be used when an insertion point, rather than a selection, is active. Inserting the requested length of silence will increase the duration of the sound:
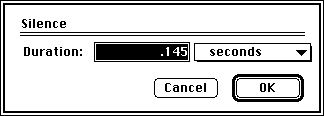
- When done, make sure all your sounds are saved (as AIFF files), then quit SoundEdit to free up memory.
Assemble Soundtrack
- Launch Director and re-open your animation file.
- Use the Import command in the File menu to find and open the sounds you have edited. Make sure the file frmat pop-up menu is set to 'All Files' or 'Sounds', otherwise you won't be able to see your files.
- Display and scroll the Cast window, if necessary, to see the sound cast members that you just imported into your animation file (they will be marked with a loudspeaker icon).
- Click to select the sound that you intend to loop as background ambience. Click the button marked with an 'i' at the top of the Cast window:
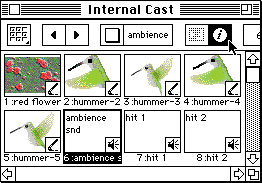
- In the dialog that appears, turn on ('X') the 'Loop' checkbox. This will force the sound to repeat.
- Drag the sound from the cast window to the first frame of sound channel 1 in the Score:
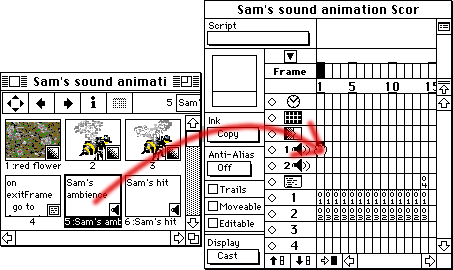
- Fill the rest of the frames of sound channel 1 with the same sound, until you reach the end of the animation (you can use the same inbetweening technique that you used in a previous session to place the background image).
- Drag the hit sounds to the appropriate frames in the animation, in sound channel 2 of the Score.
- Play back the animation. If everything sounds OK, Save the file in preparation for conversion to Shockwave format.
Export to a Shockwave for Director file
- In the Xtras menu, choose the 'Shockwave for Audio Settings' command. In the dialog that appears, adjust the settings to minimize file size while retaining as much audio quality as possible:
- Turn on the 'Enabled' checkbox for Compression.
- Choose the lowest number from the Bit Rate pop-up menu
- Turn on the 'High' option for Accuracy (this shouldn't make your wait too long if you kept your sounds small).
- Click 'OK' to close the dialog box.
- In the same Xtras menu, choose 'Afterburner'. When prompted to save the Shockwave file, find your folder on the desktop, then enter the filename (all lowercase) according to the following rules:
- your last name
- followed by an underscore (shift-hyphen)
- followed by your first name's initial
- followed by a period
- followed by
dcr
- as an example, Sam Sample's Shockwave file is called
sample_s.dcr
Click 'Save'. A progress bar will appear while the Afterburner Xtra processes your animation.
- Before leaving Director, make a note of the size (in pixels) of your animation (see 'Width' and 'Height' in the Modify-->Movie-->Properties dialog).
Add a reference to the animation in the HTML file
- Open your HTML file in SimpleText (you can drag the icon of the HTML file and drop it on the icon of SimpleText).
- Scroll through the file until you find the spot where you want to see the animation. Click to place the insertion point.
- Make sure the insertion point is not within a piece of text enclosed by angle brackets ('<' and '>').
- Enter the following HTML code:
- a left angle bracket (shift-comma)
- followed by
EMBED SRC=
- followed by the name of your dcr file, enclosed in quotes
- followed by a space
- followed by
WIDTH=
- followed by the width of your animation in pixels
- followed by a space
- followed by
HEIGHT=
- followed by the height of your animation in pixels
- followed by a right angle bracket (shift-period)
- as an example, Sam Sample's HTML file contains this line
<EMBED SRC="sample_s.dcr" WIDTH=240 HEIGHT=160>
- Save the HTML file. Make sure it is in the same folder as the dcr file.
- Test your work by dragging the icon of the HTML file and dropping it on Netscape Navigator's icon.
- When done, copy your HTML and dcr files only to the class folder on the file server, so that the instructor can post them to the web server.
Additional Info:
- The Art Computer Graphics program of Fullerton College offers a class covering the integration of various sound formats into HTML documents, ACG164-Multimedia Authoring, listed in the class schedule.
Copyright by Sandro Corsi. Last modified 6 SEP 97.