Computer Graphics Survey
Formatting Text With Style Sheets
Using PageMaker 6.0 on MacOS 8 Computers
|
previous handout |
ACG Home |
Instructor Home |
Class Home |
list of tutorials |
next handout |
Before beginning the project
If you are working in the ACG Lab
click to read these important notes before you start the tutorial.
This section of the directions contains information that pertains specifically to the way the ACG Lab operates. It may not apply if you work on the project elsewhere.
- PageMaker text can be formatted either on a case-by-case basis, or by setting up a style sheet. In the first instance, you simply select a portion of text, then choose any one of several formatting commands available in the Type menu. This however means that any later formatting changes must be done the same way: selecting and modifying each portion of text individually.
- For greater efficiency, long publications are set up by defining the formatting rules beforehand in the style sheets. Afterwards, the type is selected and the appropriate style sheet is applied to it. Already at this initial stage there is a small saving of time because several formatting commands are replaced by a single style sheet application. The greater gain in time and effort occurs when revisions are requested: instead of selecting and re-formatting each text item, it is enough to redefine the style sheet, and automatically every text item it was applied to will be updated.
- For our project, we will use style sheets because they closely resemble the way web pages are defined, and in fact PageMaker requires them to be able to convert a publication into a web file.
return to top
- Find and launch the program PageMaker, on the hard disk of your computer, inside the DTP folder.
- Use the File-->Open command to re-open the PageMaker document you created last time.
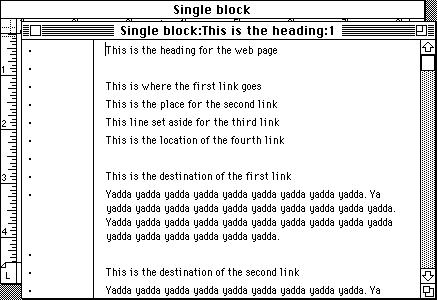
- Check that the structure of your text will work as a web page. You will want to have a table of contents at the top, indicating the main topics you cover in the body of the page. Each line of the table of contents will be later linked to a section of the page.

- If you find that you need to modify what you type, do it now to avoid extra work later. Select the text and use Edit-->Edit Story to enter the Story Editor.

When done editing the text, close the Story Editor window to return to Layout view.
- To make room at the top of the page, use the arrow tool to select the text block, and drag down its top windowshade handle:

- PageMaker will shift the text down, leaving some empty space at the top of the page. Use the text ('T') tool to drag over the first part of your text, selecting it. Make sure to include the main heading and the entire table of contents, but leave out the body of the page.

- Use the Edit-->Cut command to remove the selection and place it in temporary storage (the clipboard).
- Still using the text tool, draw a new text block in the top part of the page which you cleared earlier.

- When the flashing insertion bar appears at the top-left corner of the new text block, use the Edit-->Paste command to transfer to it your table of contents.

- To verify that the table of contents and the body of the page are indeed in separate blocks, choose the arrow tool, then use the Edit-->Select All command. The outlines of the two blocks should be displayed.

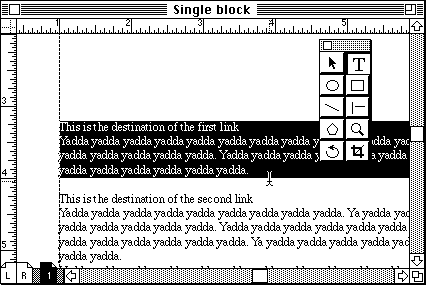
- Now repeat the same steps to break off each section of the body of the page into its own text box. Make sure that for each line in the table of contents there is a matching section in a separate block. Be careful to retain the correct top-to-bottom sequence for your text sections.

After you are done separating all the sections, again choose the arrow tool and use Edit-->Select All to verify that all the blocks are there:

return to top
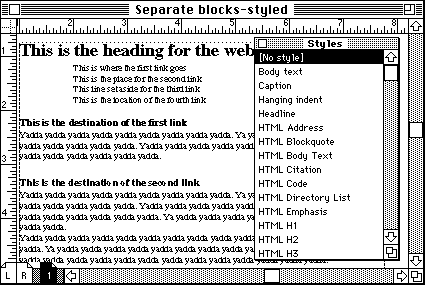
- Now we are ready to mark up our text. If the Styles palette is not on the screen, display it using the Window menu. It should list just a few default styles, as shown below:

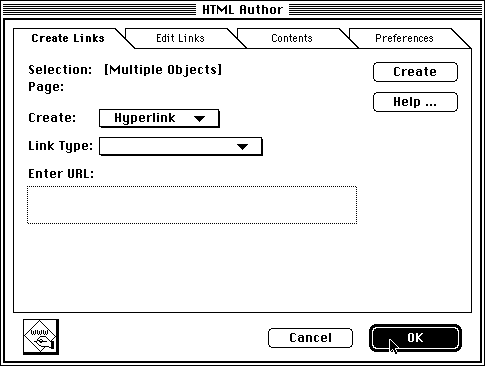
- Use the Utilities-->PageMaker Plug-Ins-->HTML Author command. PageMaker will notify you that it is verifying your document: an error message might appear if you have created elements (such as boxes and circles), which will not export to the web file--just tell PageMaker to proceed. After completing verification, the HTML Author dialog box will appear:

We will return to this dialog in the next session to complete the conversion to a web page. For now, click on the 'OK' button to let PageMaker know that you intend to mark up the document for the web. A message will appear saying that the appropriate style sheets are being added to your document.
- You will notice that the Styles palette now contains many more entries. If this did not happen (or if only a few styles were added), then you can import the same styles from another PageMaker document. Click on this link to download HTMLSTYL.PM (the document will appear on the desktop of your computer). Use the command Type-->Define Styles. In the dialog, click 'Copy'. A standard Open File dialog appears: find the document 'HTMLSTYL.PM' and open it. This will add the HTML styles--if any warning dialogs appear, click to proceed.
- All of the style sheets with names that begin with "HTML" will translate to valid web page formats (as we'll see in the next session, HTML is the markup standard that makes web pages work with many different programs on a wide variety of computers).

return to top
- To apply the style sheets, use the text tool to select a portion of your type, then click on the name of the appropriate "HTML" style sheet in the Styles palette (make sure not to use any of the non-HTML styles). Notice that, because of a limitation in the way PageMaker style sheets work, only whole paragraphs can be marked up this way (you won't be able to mark up a word by itself without affecting the surrounding type).

- Once the style sheet is applied, the type will be reformatted to show an approximation of the way it would look in a typical web page. Keep in mind, however, that the actual appearance of a web page is largely outside the control of the designer.

- Your choice of style sheets will depend on the relative emphasis you want to give to different parts of your text. In the example shown here, the main heading was marked as "HTML H1", the lines of the table of contents are in "HTML Directory List", the subheads at the beginning of each section are in "HTML H3", and the rest is "HTML Body Text".

By following this link, you can see what the example page looks like in the browser you are using now.
- When done, make sure to save, then use File-->Quit to exit PageMaker. Copy to your Zip disks the updated version of your PageMaker document, which will be needed again in the next session.
return to top
Notes
- A workaround is how you get things done when the programs you use do not work as advertised--in this case, PageMaker's generation of links to other locations within the same page is faulty and will require us to do a bit of extra work.
return
Information specific to the ACG Lab
- On ACG Lab computers, the program PageMaker is in the hard drive, inside the DTP folder.
- In the ACG Lab, a copy of the document "HTMLSTYL.PM" is in the class folder on the ACG_FILE volume of the ACG file server. Open the 'Class Materials' folder, then the 'Week 3' folder. For a reminder on how to log on to the server, see the previous handout.
- Besides the PageMaker class (ACG140), the Art Computer Graphics program of Fullerton College offers additional instruction in typesetting in ACG146-Desktop Publishing II, which covers in detail the program QuarkXPress. Look up these classes in the ACG Class Schedule.
|
return
|
|
previous handout |
return to top |
next handout |
|
This document originally at <http://acg2.fullcoll.edu/FACULTY/CORSI/LEARN/OVERVIEW/OV030MAC/INDEX.HTM>
|
Copyright 1997-99 by Sandro Corsi.
Last modified 30 Aug 1999.
|
SaneDraw home
|