ACG112 Electronic Illustration
"2D/3D crests" Project: Tracing Outlines
- Retrieve template files.
- Copy and decompress the archive file.
- Drag 'CrestsTemplates FH8.sit' from the class folder on the server to your computer's hard drive.
- Drag the copy of 'CrestsTemplates FH8.sit' on your hard drive and drop it on StuffIt Expander (in the Utilities folder). This will decompress the archive, allowing you to use the files it contains.
- Start up FreeHand.
- Make sure the Layers Palette is visible (Window-->Panels-->Layers)
- Open the template files which you decompressed.
- Each template is used for a separate crest drawing, as listed below:
- "Maze template" file
- Setup
- Lock all layers except "Crest".
- Click padlock icon next to the layer's name in the Layer palette to close the hasp
- Choose "Crest" as the current layer.
- Highlight layer name in palette.
- Trace maze
- Click with Pen tool at each vertex.
- Use Shift key to constrain to horizontal and vertical line orientation.
- Use guides to align edges:
- Make sure View-->Page Rulers is checked.
- Click on the vertical or horizontal page ruler, and drag out a guide with the same orientation.
- For assisted alignment, make sure that View-->Snap to Guides is checked.
- "Quarter-moon flower template" file:
- Setup.
- Lock all layers except "Crest". Highlight "Crest" layer name.
- Use the Pen tool to trace outlines.
- Both outlines, outside (flower) and inside (quarter-moon), are made up entirely of curve segments joined by corner points.
- Make sure (using the Object Inspector) that both outlines are 'closed' paths.
- Create a hole in the shape
- Select both paths (use arrow pointer to click on one, then Shift-click on the other).
- Use Modify-->Join. This creates a 'composite path', causing the areas where the paths overlap to become transparent.
- "Pedestal flower template" file
- Setup
- Lock all layers except "Crest". Highlight "Crest" layer name.
- Trace star shape with Pen tool.
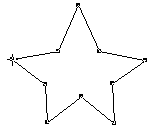
- Change star shape to flower shape
- Use arrow tool to click an anchor point at the tip of a star arm to select the point. Option-drag on the selected anchor point to extend its first direction point. Option-drag anchor point again to extend its second direction point.
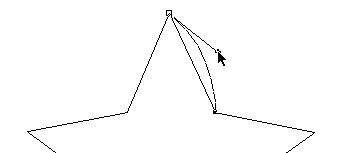
- Adjust direction points of all anchor points at the tips of the arms of the star to create curves. This transforms the star into a flower, as shown below:
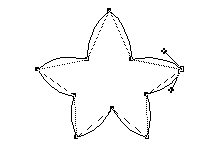
- Draw pedestal
- Use the Bezigon tool to trace half of the pedestal. Choose appropriate combination of click (corner point), control-click (connector point) and option-click (curve point)
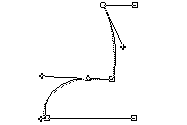
- Use Edit-->Clone to create the other half of the pedestal, then reflect it horizontally (click with Reflect tool on one of the endpoints of the path, Shift-drag to orient the clone as shown below):
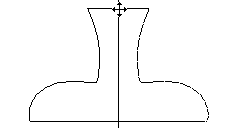
- Shift-select with arrow tool both the original path and its reflected clone. Join the selected paths (Modify-->Join). Since the selected paths are not closed, they become a single path (instead of a composite path).
- "Three arm template" file
- Setup
- Lock all layers except "Crest". Highlight "Crest" layer name.
- Trace outside and inside outlines:
- Click at each vertex with the Bezigon tool.
- Make "Marks" layer visible:
- Click to add check mark to the left of the layer's name in palette.
- You will also need to zoom in for better visibility (magnifier tool).
- Make "Tracing path" layer invisible:
- Click to remove check mark to the left of the layer's name in palette.
- Change straight segment at the end of each arm to a curved segment:
- Click anywhere on the outer path to select it, then option-click with Bezigon on the straight segment at the end of each arm of the crest, and drag the resulting Curve (round) point to the gray X mark in the template.
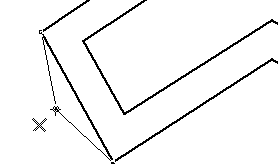
- While the new point is still selected, check "Automatic" in the Object Inspector palette. This will cause the path segment to curve.
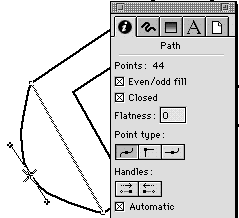
- After curving the end segments of all three arms, the end result should look like this:

(in the picture above, the inside path is hilited by a black fill)
- "Tile template" file
- Setup
- The layer for the template this time is in the foreground (because dimming makes diagonal lines hard to see).
- Again, make sure all layers except "Crest" are locked, and hilite "Crest" name.
- Trace outer outline
- Use the Bezigon tool (holding the Shift key down to get vertical, horizontal and 45° lines)
- Next create a flower-like shape:
- Use the arrow tool to Shift-click (select) the points on the sides of each arm, as shown below (select only the points that appear as hollow boxes in the following picture)
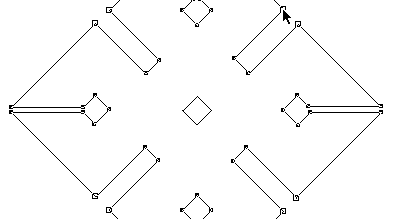
- Click on the Curve Point icon under "Point type" in the Inspector palette to change all selected points to curve type:
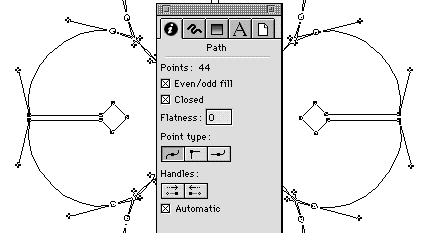
If the curves don't appear, make sure that "Automatic" is checked.
- Again use the arrow tool with the Shift key, this time to select the points on the tips of the four arms of the crest (select only the points shown below as hollow boxes):
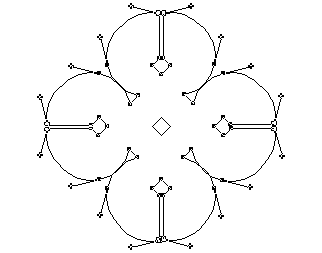
- Click on both "Curve handles" icons in the Object Inspector to retract the handles of the selected points, yielding a sharper tip for the crests' arms.
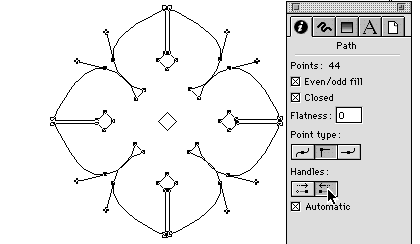
- Finally, cut out the center hole
- Use the Bezigon tool (holding Shift key down to get 45° lines) to trace inner outline (the diamond shape in the center.
- If you had already traced the center diamond, select it and use Modify-->Arrange-->Bring to Front to ensure that the inner path is on top of the outer path.
- Shift select both the outer and the inner path:
- Use the Fill Inspector (third tab from left in Inspector palette) to fill the selected paths with a Basic fill:
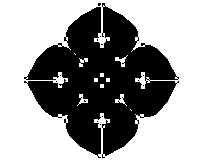
- Use Modify-->Combine-->Punch to carve a hole in the shape of the inner path out of the outer path (since one of the paths is fully surrounded by the other, this becomes an alternative way to create a composite path).

- Re-arrange layers
- Drag Tracing Path layer name in Layer palette below divider line to make it a background (non-printing) layer.
- Save all your completed tracings for shading next week.
Copyright 1998-2000 by Sandro Corsi. Last modified 8 Sep 1999.