|
previous tutorial |
ACG home |
Instructor home |
Class home |
List of tutorials |
next tutorial |
Before beginning the project
- If you are working in the ACG Lab
click to read these important notes before you start the tutorial.
This section of the directions contains information that pertains specifically to the way the ACG Lab operates. It may not apply if you work on the project elsewhere.
- If you need to get for yourself the programs mentioned in this tutorial:
- SoundEdit is a commercial program by Macromedia Inc. Macromedia does not intend to further develop this program.
- The Apple CD Audio Player program is bundled with the Mac OS by Apple Computer.
- SoundEdit can be used for two distinct functions:
- Sound recording (or conversion)
- Sound editing and special effects.
- For our project, we will use both sets of features to create a soundtrack for the animation that will be displayed with our web pages.
- Our soundtrack will be an example of sampled sound, one of the major audio technologies that can be used in a web page. Other approaches (not used in this tutorial) include MIDI and speech synthesis.
- Decide on the contents of the soundtrack.
- Either convert audio data (if your source is an audio CD) or record (from any other source). You can also combine sounds from different sources.
- After obtaining the raw material for your soundtrack, you may want to trim and clean up the recordings.
- Once you know how to select and process sounds, an alternative to recording an external source is to use SoundEdit to generate synthetic sounds.
- Ambience noises and/or background music.
- In filmmaking, this is known as wild sound, since it can be recorded separately, without a rigid relationship to the visuals.
- This type of sound is generally looped to save on file size. The duration of the sound loop doesn't have to match exactly the duration of the picture loop, since the two run independently. However, a very short loop may disguise the nature of the sound, and a very long loop needlessly increases file size.
- For the loop to work successfully, the start and end of the sound need to match (just like the start and end of the picture). Matching the endpoints of distinctively recognizable sounds (such as a voice singing) is a difficult job--you will have fewer problems if you choose a continuous, random noise like that of the surf, an engine, distant crowds, etc.
- Sound hits synchronized to specific events in the animation.
- In filmmaking, this is known as sync sound, and it requires more complex equipment so that it is recorded in lock-step to the camera.
- In animation, this type of sound is often recorded first. The visuals are created later to match a breakdown of the soundtrack called an exposure sheet. An especially important example of this technique is lip sync--matching the movement of the animated characters' mouths to the actors' dialog.
- The duration of this type of sound must match exactly the duration of the relevant visuals. To make this easier, SoundEdit allows you to measure sound lengths in frames--provided you specify the correct frame rate.
- To audition sounds to decide on what to record:
- Use the command Apple menu-->Control Panels-->Sound to display the Sound window. In the window, click on the 'Input' tab. Choose your sound source from the list in the window (close the window when done):
- For an audio CD playing in the CD-ROM drive, choose 'CD'.
- For a microphone plugged into the microphone connector, choose 'External Mic'.
- For another sound source plugged into the microphone connector, choose 'Sound In'. Turn on the checkbox 'Play sound through output device'.
- To listen to a CD, start up the Apple CD Audio Player program. Insert the CD in the CD-ROM or DVD drive of the computer. A pop-up menu labeled 'Audio CD' appears at the top-right of the window--use it to select a track for playback.
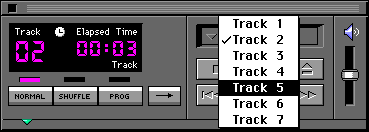
- To listen to another source, simply make sure it is plugged in, cue it up, and start playback. The Audio In connector is indicated by a microphone symbol.

- To adjust playback volume, use the speaker button on the Control Strip (the Apple CD Audio Player also has a separate volume slider on the right edge of the window).
- When ready to acquire the sounds, launch the SoundEdit application, found in the Sound folder on the hard drive.
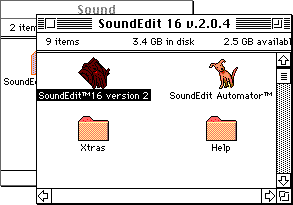
- It's important to select your sound source before launching SoundEdit, otherwise the program may not recognize the input.
| return to top |
- Make sure the CD is in the CD-ROM or DVD drive of the computer.
- In SoundEdit, use the Convert CD Audio command in the Xtras menu to choose an audio track, then click 'Open'.
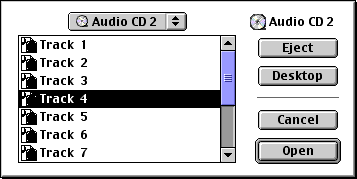
- In the 'Save' dialog that appears next, find your folder (so the converted file will be stored in it), enter a filename, then click 'Options' to display the Audio CD Import Options dialog:
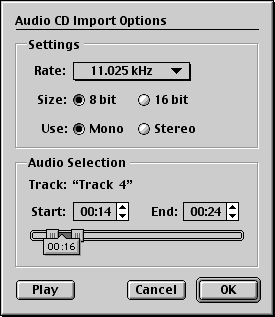
- In the Settings section, choose options yielding a smaller file size: the lowest one of the Rates, 8 bits for the sample Size, and Mono.
- In the Audio Selection section, use the 'Start' and 'End' fields (or the sliders) to indicate the portion of the track that you want to use in the animation. You can listen to the track (using the 'Play' button) to help you decide. Remember to keep it short--these files can get quite large.
- When done, click 'OK' to return to the previous dialog, then click 'Save'.
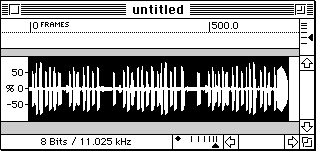
- SoundEdit will save the converted sound to the filename and location that you specified, and open it in a new document window. A waveform graph representing the sound will appear in the window.
| return to top |
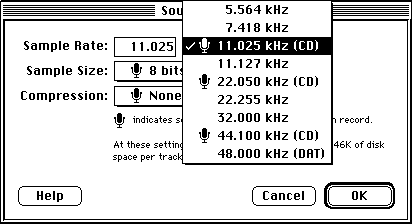
- In SoundEdit, use the Sound Format command in the Modify menu to choose 8 bits for the Sample Size, and the lowest one of the Rates marked with a microphone icon (there may be only one such rate on some machines). Make sure to leave Compression turned off (later, Director will compress the soundtrack while converting the animation to Shockwave). For improved sound quality (but possibly less-efficient compression), turn on the 'Use Dither' checkbox.
- Use the Ruler Units command in the View menu to choose Frames as the unit. In the field that appears next to Frames, enter the frame rate you selected in Director for your animation.
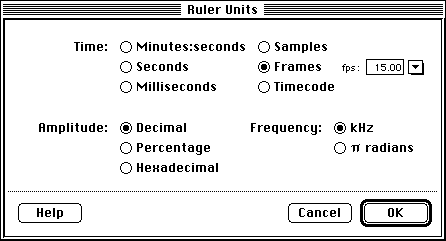
Unless you made changes to the default settings (using Director's Control Panel), your animation's frame rate is likely 15 fps (frames per second).
- If necessary, use the Window menu to display the Levels palette. You may also have to expand the palette (clicking on its zoom box) to see the control sliders (as shown in the picture below). Start your sound source (or rehearse talking into the microphone), and adjust the recording sliders (indicated by the microphone icon) for the best levels: loud enough to show many green bars in the meter, but not so loud that yellow and red bars appear. In the example pictured here, the left channel (topmost in the display) is set too loud, while the right channel is too soft.

- Press the record button when your sound source is properly cued up.
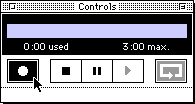
- Press the Stop button when done recording.
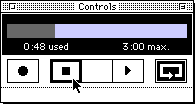
- A waveform graph representing the newly recorded sound will appear in the document window.
- If the computer you used did not support a low enough sample rate, the file will be quite large. While the window with your recording is active, choose again Modify-->Sound Format (this will now apply to the existing sound data). Choose 8 bits, 11.025 kHz, compression 'None', then click 'OK' to downsample the recording.
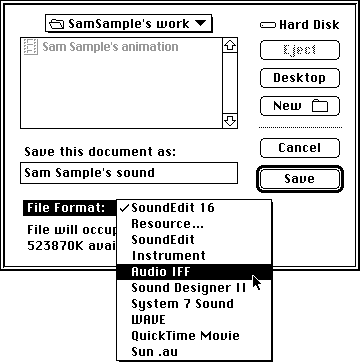
- Use the Save command in the File menu, choose Audio IFF as the file format.
| return to top |
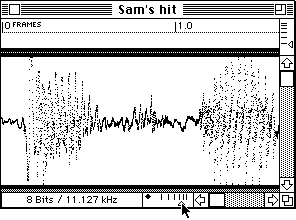
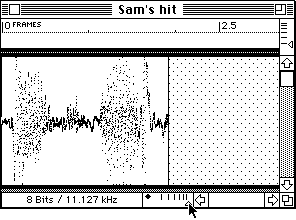
- Adjust the waveform display (using the slider at the bottom of the document window) to better see the parts you are interested in:
- Zoom in for a detailed view
- Zoom back out to see the big picture
- Click in the waveform display, and drag to highlight the portion of the sound that you want to clean up.
- Verify that the selection matches the sound you want by using Play (in Control menu): only the selected portion of the sound will be heard.
- If Loop is checked in the Control menu, the selection will play back repeatedly. This is useful to check how long your ambience recording needs to be to sound right when looped.
- To easily identify and retrieve the selected portion of the sound, create a Label (in the Insert menu). When the highighted default label appears, enter a brief name for the selection.
- If you later click on the Label, the sound segment will be selected again, so you can go back to working with it.
- Labeled segments can be quickly selected and/or played using the Labels palette (Window menu).
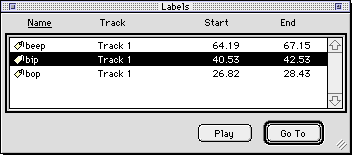
- While the segment is selected, it can be color-coded using the Color submenu of the Modify menu.

- To remove part of a sound, shortening the entire sound:
- Select the unwanted segment, then press the 'Delete' key
- The portion of the sound following the deleted segment automatically moves up to close the gap.
- To remove part of a sound, leaving a pause in its place (the overall length of the sound does not change):
- Select the unwanted segment
- Insert-->Silence. The duration listed in the dialog automatically matches the duration of the selection, so you can directly click 'OK'.
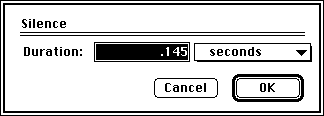
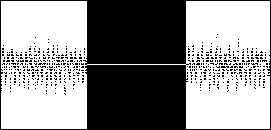
- In the waveform, a horizontal line will replace the selected segment. Replacing inaudible noise with pure silence improves file compression.
- To keep a portion of the sound, while eliminating the rest:
- Select the segment you want to keep
- Edit-->Crop. Parts of the sound outside the selection will be deleted.
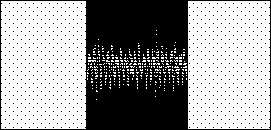
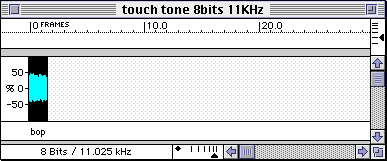
- After using Crop, the sound will be left at the same position in the file--meaning that there will be some silence before anything is heard. This would make it hard to accurately synchronize sound and picture in Director.
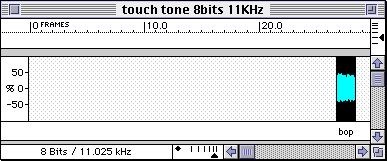
- Make sure to reset the sound offset to zero with the Modify-->Track Offset command. The waveform should start flush with the left margin of the document.
- To rearrange the sequence of sounds:
- Select the segment you want to move.
- Edit-->Cut.
- Click in the waveform to place the insertion point where you want the segment to go.
- Edit-->Paste.
- To replicate a sound:
- Select the segment you want to replicate.
- Edit-->Copy.
- Click in the waveform to place the insertion point where you want the copy of the segment to go.
- Edit-->Paste.
| return to top |
- Use commands in the Insert menu, such as Tone, Noise, and FM Synthesis
- Beware that if any part of a waveform is selected, these commands will replace the selection. By default, the duration of the insert will be the same as that of the selection, so that the total duration of the sound will not change.
- Note that these commands can also be used when an insertion point, rather than a selection, is active. Inserting the requested length of tone or noise will increase the total duration of the sound.
- Noise creates 'white noise' (a random distribution of frequencies). This sounds like the 'static' on a receiver not tuned to any station.
- Tone creates a uniform-pitch sound wave.
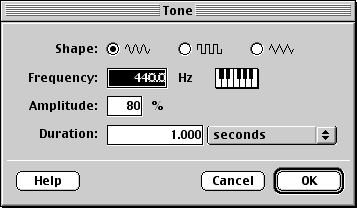
- Choose the shape of the wave (from left to right--'Sine', 'Square', and 'Sawtooth'): sine will sound more pleasant, sawtooth will sound more grating.
- Choose the frequency (the note or pitch)
- Set the Amplitude (loudness) as a percentage of the maximum possible without distortion.
- FM Synthesis creates a variable-pitch sound wave.
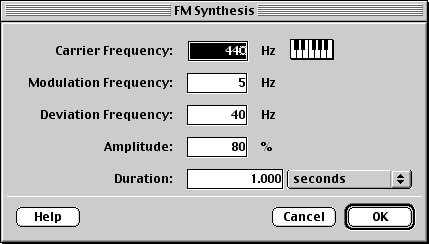
- The Carrier Frequency is the base pitch for the sound (similar to the single frequency in the Tone command)
- The Modulation Frequency indicates how often the pitch changes (e.g., 5 Hz means the pitch changes five times per second)
- The Deviation Frequency is the amount of pitch change you want.
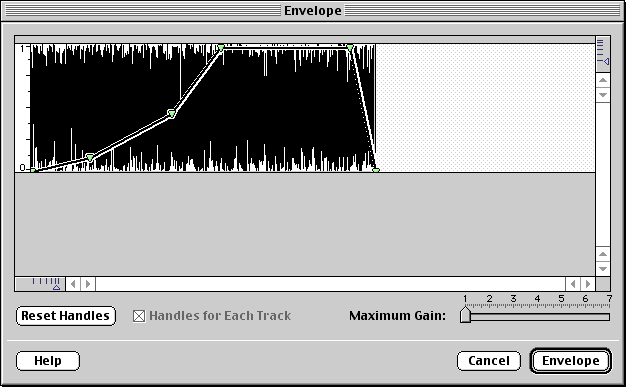
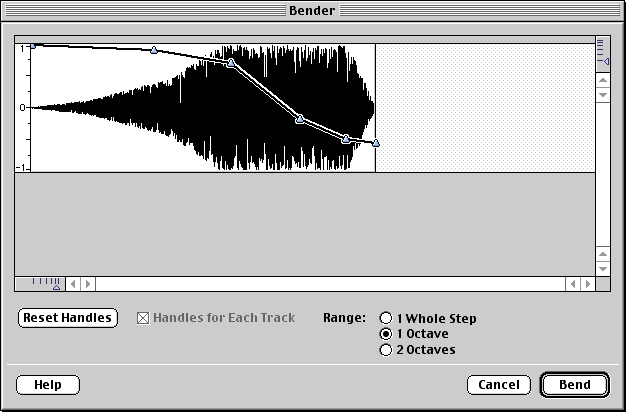
- Use commands in the Effects menu to 'shape' the sound. Major changes can be effected with the following:
- Envelope determines how the loudness of the sound changes over time. The picture shows the settings for a sound that gets gradually louder, then abruptly cuts out.
- Bender determines how the pitch of the sound changes over time. The picture shows the settings for a sound that starts at a high pitch, then drops to a low pitch. This can be used to suggest the sound of an object approaching the viewer, then moving away (doppler effect).
| return to top |
Notes
- MIDI files contain a list of the notes to be played by a music synthesizer
- The music synthesizer can be a piece of hardware hooked up to the computer, or a program running on the computer itself.
- MIDI files can efficiently represent extended pieces with small files--since the bulk of the information (instrument samples) is already built into the synthesizer.
- On the other hand, MIDI files can only play sounds for which an instrument is available in the synthesizer.
| return |
- Speech synthesis is the simulation of a human voice talking
- The speech sounds are usually created by a program running on the computer, although in some cases specialized hardware is used.
- Speech files are plain text, with optional commands to fine-tune the pronunciation. They too are small and efficient--since the voice data is built into the speech synthesizer.
- Unlike MIDI, there is at the moment no firm standard for speech synthesis. Using it in a web page, therefore, will restrict your audience to only those computers compatible with the particular speech program you used.
| return |
Information specific to the ACG Lab
- On ACG Lab computers, the program SoundEdit is on the startup drive, inside the Sound folder.
- On ACG Lab computers, the Apple CD Audio Player program is on the startup drive, inside the Utilities folder.
- In the ACG lab, there are currently two types of computers, recognizable by the type of monitor--the back is either grey or transparent plastic.
- Only the grey-monitor computers have a connector for a microphone or other external sound input.
- The lab has special microphones available for checkout (most ordinary microphones would not work).
- To record from another external source, you need to bring in your own device (cassette player, minidisc player, etc.) and your own connection cable.
One end of the cable must have whatever type of connector is required by your device.
The other end (the one that will connect to the computer) must have have a 1/8" miniplug, shown below:

- Both types of computers will allow you to extract sounds from an audio CD.
- To preserve everybody's sanity, it is highly recommended that you bring a pair of headphones (the ordinary walkman-style type with a 1/8" miniplug).
On the grey-monitor computers, plug the headphones into the connector labeled with a speaker icon.
On the transparent-monitor computers, plug the headphones into the connector labeled with a headphones icon.
- After completing this step of the project, make sure to copy your sound files to your Zip disks. These files will be needed again for subsequent steps of the project. The filename can be anything you want, since these sound files will not end up on the web server directly.
- Help for SoundEdit is available on the file server, in ACG_DOCS.
- The Art Computer Graphics program of Fullerton College offers a class on sound recording and editing, ACG68-Sound for Multimedia. Find it in the ACG Class Schedule.
| return |
|
previous tutorial |
return to top |
next tutorial |