Puzzle Project: Laying Out the Pieces
|
ACG home |
SaneDraw home |
Instructor home |
learning resources home |
class home |
handouts index |
The following steps set up the graphics and overall layout
for the Puzzle project.
- Find and launch the Director 5 application (in the Multimedia
folder on the hard drive).
- Director will open with a new
untitled document. Make sure to start saving right away.
- Director's windows and palettes take up a lot of room on the screen.
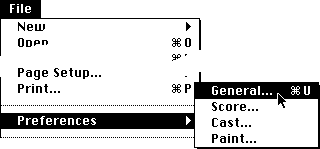
To optimize space usage, start by changing the Preferences:

In the
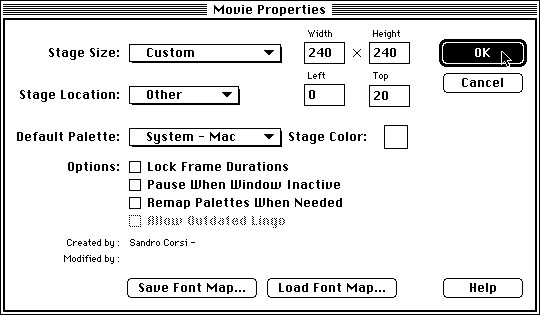
dialog that appears, turn off "Center":

- Next, set the
size and position of the movie document:

In the
dialog, set width and height to 240 pixels (this reduced size ia also
necessary to minimize file size for transmission over the Internet). Set
the position to Left = 0 and Top = 20 (this assumes you have turned off
the Toolbar in the Window menu, otherwise Top must
be increased).

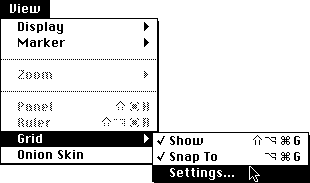
- To make the
layout easier, turn on "Show" and "Snap To" for the alignment grid, and
bring up the Settings dialog:

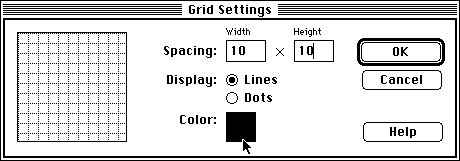
In the dialog, change the spacing to
suit the size of your layout elements. You can also change the color and
appearance of the grid:

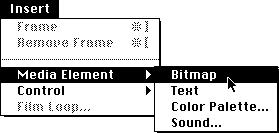
- Start creating the pieces of
the puzzle by inserting a new bitmap media element. This will bring up
the Paint window, where you can create the pieces from scratch. If you
prefer, you can also paste in pictures from another program (Edit
menu).

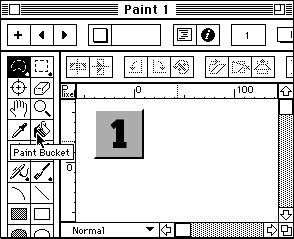
- In the Paint window you will find the usual tools and commands
available in most painting programs. Note how each tool appears labeled
when you move the cursor over its icon. For greater accuracy, you might
want to turn on the rulers (in the View menu).

- When done painting the first bitmap element, you
can start on a new one by clicking the '+' button at the top of the
Paint window.

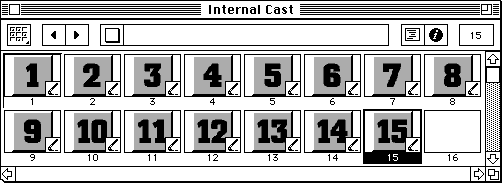
- When done painting
all the puzzle pieces, you should see the thumbnails of 15 bitmap
elements in the first 15 locations in the Cast window. In the example,
each piece carries a number to clarify the explanation of the project,
but your tiles can have any image you prefer.

- Since we are concerned with the final file size, it is important to
lower the number of colors as much as possible. Director will default to
creating elements at the same bit-depth as the display (e.g., 16 bits
for Thousands of colors), but it is often possible to reduce the range
of colors without damaging the appearance of the picture). Since
bit-depth transformations cannot be undone, make sure to save
before proceeding, since you will have to revert to the last version
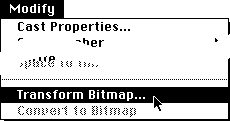
saved if you don't like the results. After saving, shift-select your
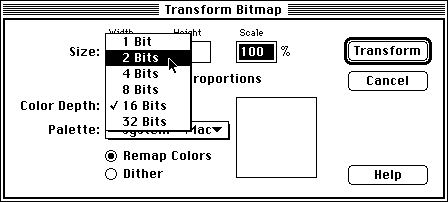
bitmaps in the Cast window, then bring up the Transform Bitmap
dialog:

In the
dialog, choose a lower bit depth from the pop-up menu. Dithering will
often yield smoother results, but the file will not compress as much as
when the colors are simply remapped. The tiles in the example were
remapped to 2 bits (= 4 grey values).

- You are now ready to
arrange the pieces of the game. Make sure both the Score and Cast window
are visible (use the Window menu otherwise), then drag the first bitmap
from the Cast to the first cell in channel 2 in the Score. Note that we
are skipping channel 1 to make room for a backdrop image, since elements
in lower-numbered channels appear layered further behind.

The first piece of the puzzle will appear selected and
centered in the animation area (called the Stage). You can proceed to
drag it do its proper position:

- Repeating the process
for the other pieces, you should end up with the Score showing entries
for cast members 1 thru 15 in channels 2 thru 16. On the stage, you
should have 4 rows of four tiles (save for the last row, which of course
will be missing the last piece).
- To add the backdrop element,
return to the Paint window and create and paint a new bitmap. A trick
you might want to try to keep the file size down is to create a
small image which will be stretched on the stage. In the example, the
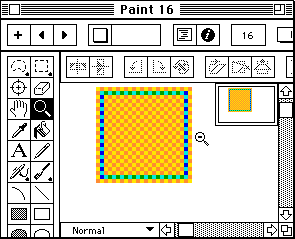
backdrop is a square bitmap 24 pixels across. To paint small details
accurately, zoom in with the Magnifier tool. Click on the
actual-size detail in the corner to return to normal viewing:

If you do
create a reduced-size bitmap, you will want to scale it after dragging
it to the first cell in channel 1 of the Score. Bring up the Sprite
Properties (sprites are instances of cast members that appear on the
Stage):

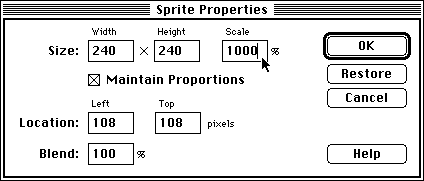
In the
dialog, you can enter a new size or a scale percentage (a less-accurate
alternative approach is to drag the handles surronding the sprite when
it is selected on the Stage):
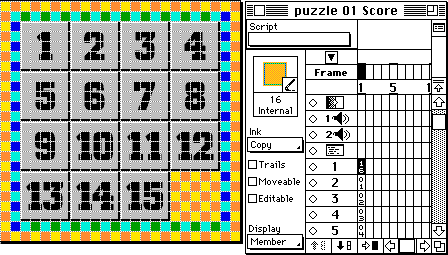
- After
positioning every element, your completed layout and the score should
look somewhat like this:

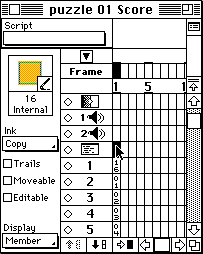
- Before testing, we need to
make sure that the first column of cells in the score (the first
frame) will keep playing indefinitely. First uncheck Loop
Playback in the Control menu (since the web version of our puzzle won't
recognize this setting). Then proceed to add a 1-line script in Lingo
(Director's programming language) to the first frame, by double-clicking
the first cell of the Script channel (immediately above channel
1):

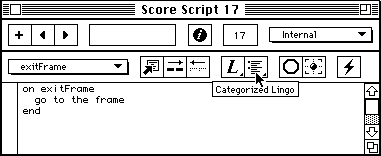
The Script window will appear,
where you can complete the script to read:
on exitFrame
   go to the frame
end
The script causes the movie to return to the current frame everytime it
is about to leave it. Note that the top of the Script window contains
buttons to assist you if you had to type in more complex
scripts.

When done with the
Script window, close it by pressing the Enter key (in the numeric keypad
on the right side of the keyboard). The script you just typed will
appear as a new cast member. The number of the cast member will appear
in the script cell you originally double-clicked in the score.

- Finally, to allow the viewer to interact with the
pieces of the puzzle, we need to make them movable. Select the
first frame cells in channels 2 thru 16 in the score (you can click and
drag over them), then check the "Moveable" checkbox:

- You can now test the movie. In the Control Panel (if not visible,
display it using the Window menu), click on the Play button:

Verify that the pieces of
the puzzle can be dragged around. You will also notice that the pieces
are not constrained, which makes the puzzle less than challenging--this
will be fixed in later stages of the project. - When done, click on
the Stop button:

To reset the pieces, click the Rewind
button:

- Make sure to have your Director file so
you can continue working on the project in our next session.
If you have the Shockwave
plugin properly installed in your browser, you can see a working example of this first version of
the puzzle. You can also download an
editable copy of the sample Director movie (Director 5 for Macintosh
format, Stuffed and BinHexed, 9,019 bytes).
Copyright 1996 by
Sandro Corsi.
Last modified 29 SEP 96.
